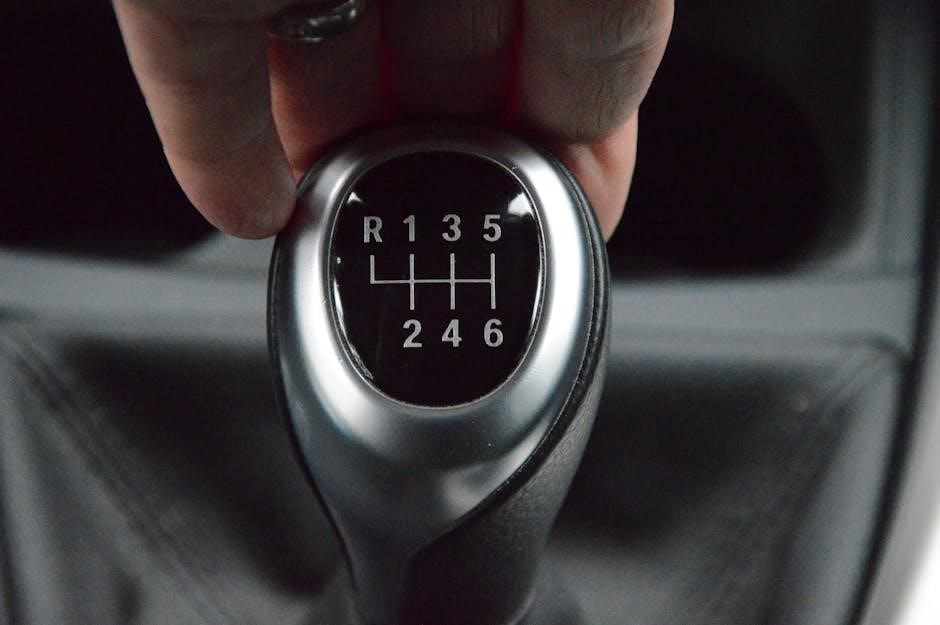
97 camaro ss manual transmission removal
1997 Camaro SS Manual Transmission Removal: A Comprehensive Guide
This guide offers detailed instructions for removing a manual transmission from a 1997 Chevrolet Camaro SS. It covers preparation, component disconnection, mounting removal, and essential tools. Dropping the transmission can be challenging, but doable at home.
Removing the manual transmission from your 1997 Camaro SS can seem daunting, but with the right preparation and knowledge, it’s a manageable task for the home mechanic. This process typically involves disconnecting various components, including the driveshaft, torque arm, wiring, and fuel lines, before finally unbolting and lowering the transmission assembly.

This guide aims to provide a clear and concise walkthrough, empowering you to confidently tackle this project. Whether you’re replacing a worn clutch, addressing transmission issues, or embarking on a performance upgrade, understanding the removal process is crucial. Remember to prioritize safety throughout the procedure, utilizing proper tools and techniques to prevent injury and damage to your vehicle.
Before diving in, ensure you have a suitable workspace, the necessary tools, and a clear understanding of each step. Patience and attention to detail are key to a successful transmission removal. This introduction sets the stage for a smooth and efficient process, laying the groundwork for the detailed instructions that follow. Proceed with confidence, and you’ll be well on your way to completing this task.
Preparation and Safety Precautions
Before commencing any work on your 1997 Camaro SS, meticulous preparation and adherence to safety precautions are paramount. Begin by gathering all necessary tools and equipment, ensuring they are in good working order. This includes jack stands, a floor jack, wrenches, sockets, and safety glasses. Securely lift the vehicle and support it with jack stands, never relying solely on a jack.
Disconnect the negative battery cable to prevent electrical shorts during the removal process. Allow the exhaust system to cool completely to avoid burns. Consider wearing gloves to protect your hands from grease and sharp edges. Clearly mark and label any wiring or hoses that will be disconnected to facilitate reassembly.
Ensure you have adequate lighting and a clean, organized workspace. Review the entire procedure beforehand to familiarize yourself with each step. If you’re unsure about any aspect of the removal, consult a repair manual or seek guidance from a qualified mechanic. Taking these precautions will not only ensure your safety but also contribute to a smoother and more efficient transmission removal process.

Tools Required for the Job
Successfully removing the manual transmission from your 1997 Camaro SS requires a specific set of tools. First and foremost, you’ll need a reliable floor jack and sturdy jack stands to safely elevate and secure the vehicle. Essential hand tools include a comprehensive socket set (both metric and standard), a variety of wrenches, including a 9/16 swivel socket for those hard-to-reach bell housing bolts, and extensions to access tight spaces.
A transmission jack is highly recommended for safely lowering and raising the transmission. You’ll also need screwdrivers (both flathead and Phillips head), pliers, and potentially a pry bar for stubborn components. Don’t forget safety glasses to protect your eyes and gloves to protect your hands.
Additional helpful tools include a torque wrench for proper reassembly, a drain pan for catching transmission fluid, and zip ties or tape for labeling wires and hoses. Having the right tools readily available will significantly streamline the removal process and minimize frustration. A penetrating oil can also be useful for loosening rusted bolts.
Step-by-Step Removal Process
Begin by safely lifting your 1997 Camaro SS and securing it on jack stands. Ensure the car is stable before proceeding. Disconnect the negative battery cable to prevent electrical shorts. Next, drain the transmission fluid into a suitable pan. Then, disconnect the driveshaft at the rear axle and slide it out of the transmission.
Carefully disconnect the torque arm from the transmission. Unplug all wiring connectors attached to the transmission, labeling them for easy reinstallation. Disconnect any fuel lines or vacuum lines that may be in the way, taking precautions to prevent fuel spillage. Remove the motor mount bolts to allow for engine movement.
Access and remove the bell housing bolts, using a swivel socket and extension for the top bolts. With all connections detached and bolts removed, carefully lower the transmission using a transmission jack. Once lowered, inspect the clutch and throwout bearing for wear or damage. Finally, move the transmission out from under the car.
Disconnecting the Driveshaft
The initial step in disconnecting the driveshaft involves safely raising your 1997 Camaro SS and firmly securing it on jack stands. This ensures a stable and safe working environment. With the vehicle properly supported, locate the driveshaft, which connects the transmission to the rear axle.
Before proceeding, position a drain pan beneath the driveshaft to catch any residual transmission fluid that may leak out during the disconnection process. Using appropriate wrenches or sockets, carefully remove the bolts or U-joint straps that secure the driveshaft to the rear axle. Once these fasteners are removed, gently push the driveshaft forward, sliding it out of the transmission.
Be mindful of the slip yoke as it disengages from the transmission, as this is where fluid leakage is most likely. After the driveshaft is completely detached, inspect the U-joints for any signs of wear or damage. If necessary, replace them before reinstalling the driveshaft later. Store the driveshaft in a safe location to prevent damage during the transmission removal process.
Disconnecting the Torque Arm
After detaching the driveshaft, the next crucial step involves disconnecting the torque arm. The torque arm is a vital component that helps control axle wrap and maintains proper pinion angle, especially under hard acceleration. Its removal is essential to facilitate the transmission’s safe and unobstructed removal from your 1997 Camaro SS.
Begin by locating the torque arm, which typically runs from the transmission tail housing to a mounting point on the rear axle or chassis. Depending on the specific setup, the torque arm may be connected with bolts or a bracket system. Using appropriate wrenches or sockets, carefully loosen and remove the fasteners securing the torque arm to both the transmission and the rear axle.
Exercise caution during this step, as the torque arm may be under slight tension. Once all fasteners are removed, gently detach the torque arm from its mounting points. Inspect the torque arm bushings for any signs of wear, cracks, or deterioration. Replace them if necessary to ensure proper function and handling upon reinstallation. With the torque arm safely disconnected, you can proceed to the next phase of the transmission removal process.
Disconnecting Wiring and Fuel Lines
Before attempting to remove the transmission, it is imperative to disconnect all associated wiring and fuel lines. This step ensures safety and prevents damage to these components during the removal process. Begin by locating all electrical connectors attached to the transmission, including those for sensors, switches, and solenoids. Carefully disconnect each connector by pressing the release tabs and gently pulling them apart. Label each connector with tape to simplify reassembly later.
Next, identify any fuel lines that may be routed near the transmission. Although less common with manual transmissions, some fuel lines might be in close proximity. If present, carefully disconnect them using appropriate tools and following proper safety procedures to prevent fuel spillage. It’s advisable to have a container ready to catch any residual fuel. Once all wiring and fuel lines are disconnected, double-check to ensure nothing is still attached to the transmission. This meticulous approach minimizes the risk of damage and ensures a smooth and safe removal process.
Removing the Motor Mount Bolts
Before you can safely remove the transmission, it’s important to address the motor mounts. These mounts help support the engine’s weight and dampen vibrations. Removing the motor mount bolts is a crucial step in providing the necessary clearance for transmission removal.
Begin by locating the motor mount bolts, which are typically found on either side of the engine, securing it to the frame. Support the engine using an engine support bar or a floor jack with a wooden block placed under the oil pan. This support is essential to prevent the engine from shifting or dropping when the bolts are removed.
Carefully loosen and remove the motor mount bolts on both sides. Be prepared for the engine to shift slightly once the bolts are removed. With the motor mount bolts completely removed, the engine will have enough flexibility to allow the transmission to be lowered and removed without obstruction. Ensure the engine is securely supported before proceeding to the next step.
Accessing and Removing Bell Housing Bolts

Accessing and removing the bell housing bolts is a critical step in separating the transmission from the engine. These bolts secure the transmission to the engine block, and removing them requires patience and the right tools.

Start by locating the bell housing bolts, which are typically arranged around the perimeter of the bell housing where it meets the engine block. Some bolts may be difficult to reach due to their location, often requiring the use of extensions and swivel sockets.
Begin loosening the lower bolts first, working your way around the bell housing. Be prepared for tight bolts, and use penetrating oil if necessary to help loosen them. Once the lower bolts are removed, focus on the upper bolts, which are usually the most challenging to access. With all the bell housing bolts removed, double-check to ensure none are missed. The transmission should now be ready to be separated from the engine.
Using Swivel Socket and Extension for Top Bolts
Accessing the top bell housing bolts on a 1997 Camaro SS during manual transmission removal can be particularly challenging. The limited space and awkward angles often make it difficult to reach these bolts with standard tools. This is where a swivel socket and extension become invaluable.
A swivel socket, also known as a universal socket, allows you to apply torque at an angle, making it possible to reach bolts that are otherwise inaccessible. Combine this with a long extension, and you can navigate around obstructions like the firewall and exhaust components.
When using a swivel socket and extension, ensure that the socket is securely seated on the bolt head to prevent slippage and potential damage. Apply steady, even pressure to avoid rounding off the bolt. If a bolt is particularly stubborn, consider using penetrating oil and allowing it time to soak in before attempting removal. With the right technique and tools, even the most difficult top bell housing bolts can be accessed and removed.
Lowering and Removing the Transmission
With all bolts, wiring, and linkages disconnected, the final step is to carefully lower and remove the transmission from the 1997 Camaro SS. This process requires a transmission jack for safe and controlled descent. Position the transmission jack securely under the transmission, ensuring proper support and balance.
Slowly lower the transmission, double-checking for any remaining obstructions or snags. As the transmission descends, guide it carefully to prevent it from swinging or tilting. Once the transmission is fully lowered onto the jack, roll it out from under the vehicle.
Before completely removing the transmission from the area, take a moment to inspect the surrounding components, such as the clutch, flywheel, and bell housing. This is an opportune time to identify any potential issues or wear that may require attention. With the transmission safely removed, you can proceed with further inspection and maintenance tasks.

Clutch and Throwout Bearing Inspection
Once the transmission is removed from your 1997 Camaro SS, a thorough inspection of the clutch and throwout bearing is crucial. Begin by examining the clutch disc for wear. Look for uneven wear patterns, cracks, or excessive thinning of the friction material. A worn clutch disc can lead to slippage and reduced performance.
Next, inspect the pressure plate for signs of heat damage, scoring, or broken springs. A damaged pressure plate can cause clutch chatter or failure to disengage properly.
Pay close attention to the throwout bearing, also known as the release bearing. Check for smooth and quiet operation. A worn or damaged throwout bearing can cause noise, vibration, and difficulty shifting. Replace the throwout bearing if it exhibits any signs of wear or damage. Carefully inspect the bearing’s contact surface for any imperfections.
Finally, evaluate the pilot bearing or bushing in the crankshaft. Ensure it is properly lubricated and free from excessive play. A worn pilot bearing can cause noise and vibration, as well as premature wear on the transmission input shaft.
Installation Tips and Considerations
When reinstalling the manual transmission in your 1997 Camaro SS, meticulous attention to detail ensures a successful outcome. Begin by applying a thin coat of high-temperature grease to the transmission input shaft splines. This will facilitate smooth engagement with the clutch disc. Ensure the clutch disc is properly aligned using an alignment tool.
Carefully guide the transmission into the bellhousing, ensuring the input shaft engages smoothly with the pilot bearing. Avoid forcing the transmission, as this can damage the clutch disc or pilot bearing. Once the transmission is fully seated, install the bellhousing bolts and torque them to the manufacturer’s specifications.
Reconnect all wiring harnesses, fuel lines, and other components that were disconnected during removal. Pay close attention to the routing of wires and hoses to prevent chafing or damage. Reinstall the driveshaft and torque arm, ensuring they are properly aligned and secured.
Finally, refill the transmission with the correct type and amount of fluid. Check for leaks and test the operation of the clutch and transmission before driving the vehicle.

Troubleshooting Common Issues
Encountering difficulties during the manual transmission removal or installation on your 1997 Camaro SS is not uncommon. One frequent issue is difficulty removing the bellhousing bolts, particularly the upper ones. A swivel socket and long extension can significantly aid in accessing these bolts. Ensure the socket is securely seated to prevent slippage and potential damage.
Another common problem is the transmission getting stuck during removal. This often occurs due to misalignment or binding with surrounding components. Double-check that all wiring, fuel lines, and the driveshaft are fully disconnected. Gently wiggle the transmission while applying steady pressure to encourage it to separate from the engine.
Upon reinstallation, difficulty engaging gears can arise. This could indicate improper clutch disc alignment or a faulty throwout bearing. Verify the clutch disc is correctly aligned and the throwout bearing is properly seated. If issues persist, inspect the clutch master and slave cylinders for leaks or damage.
Finally, always ensure proper fluid levels after reinstallation. Low fluid can cause shifting problems and damage the transmission.